This Getting Started Guide requires v0.14 of BladeRunnerJS or above. Download BladeRunnerJS.
This guide provides you with a basic overview of getting started with BladeRunnerJS (BRJS), including covering some of the core concepts.
This isn't your typical 2 minute getting started guide. This is because BRJS helps you build large-scale applications, so we need to go into a bit of detail. In this guide we'll follow the JavaScript convention - since conventions are good - and build a componentized version of the Todo MVC app. This version of the guide using Knockout but there is also a tutorial, that goes into less detail, but demonstrates how to use AngularJS in a BRJS app.
We'll cover:
- Downloading and installing BRJS
- Creating an Application
- Creating a Todo item
InputBlade - Running and Testing Blades in Workbenches
- Unit testing Blades
- Creating a Todo
ItemsBlade - Inter-Blade communication using an EventHub Service
- Testing Blade interactions by stubbing Services
- Adding Blades to an application Aspect
- Building and Deploying a BRJS application
It'll be time well-spent.
Prerequisites
In order to run BRJS you'll need Java 7 or above installed. If you haven't already got it installed we recommend installing the JDK as it ensures that java is accessible from the command line/terminal after installation. To deploy the built app you'll need any web server that can serve static files, for the purposes of this guide well be using Apache Tomcat since it's easy to install and it's only requirement is a JVM which you'll already have in order to run BRJS.
Download & Install BRJS
Download the latest BRJS release and unzip it somewhere. We'll now refer to that unzipped location as BRJS_HOME. The BRJS CLI executable is BRJS_HOME/sdk/brjs.
Note: in order to use the brjs commands from any location on your machine, add BRJS_HOME/sdk to your Path in Environment Variables.
Note: Upon running your first brjs command, you will be asked whether you would like to provide anonymous tracking of your use of BRJS. This means that information such as commands run, bundle times or operating system used, will be recorded for research purposes. We would like to encourage you to participate, as this will help us improve our products by gaining insight into common use cases and system specifications. Should you change your mind later on, you can always do so by either:
- running any
brjscommand with the--statsflag (tracking enabled) or--no-statsflag (tracking disabled) or; - editing the value of the property
allowAnonymousStatsin yourBRJS_HOME/conf/brjs.conftotrue(tracking enabled) orfalse(tracking disabled).
Create an Application
Executing the following will create a new application called brjstodo within
the BRJS_HOME/apps directory.
$ ./brjs create-app brjstodo
BRJS apps presently have to reside within an apps folder in the unzip directory. Future releases will allow for apps to be located anywhere on disk.
In the app directory, which represents your main view or aspect, you'll find an index.html entry point a src directory for your JavaScript, a themes directory for your CSS and images, and a resources directory for everything else. You can view this by starting the BRJS development server:
$ ./brjs serve
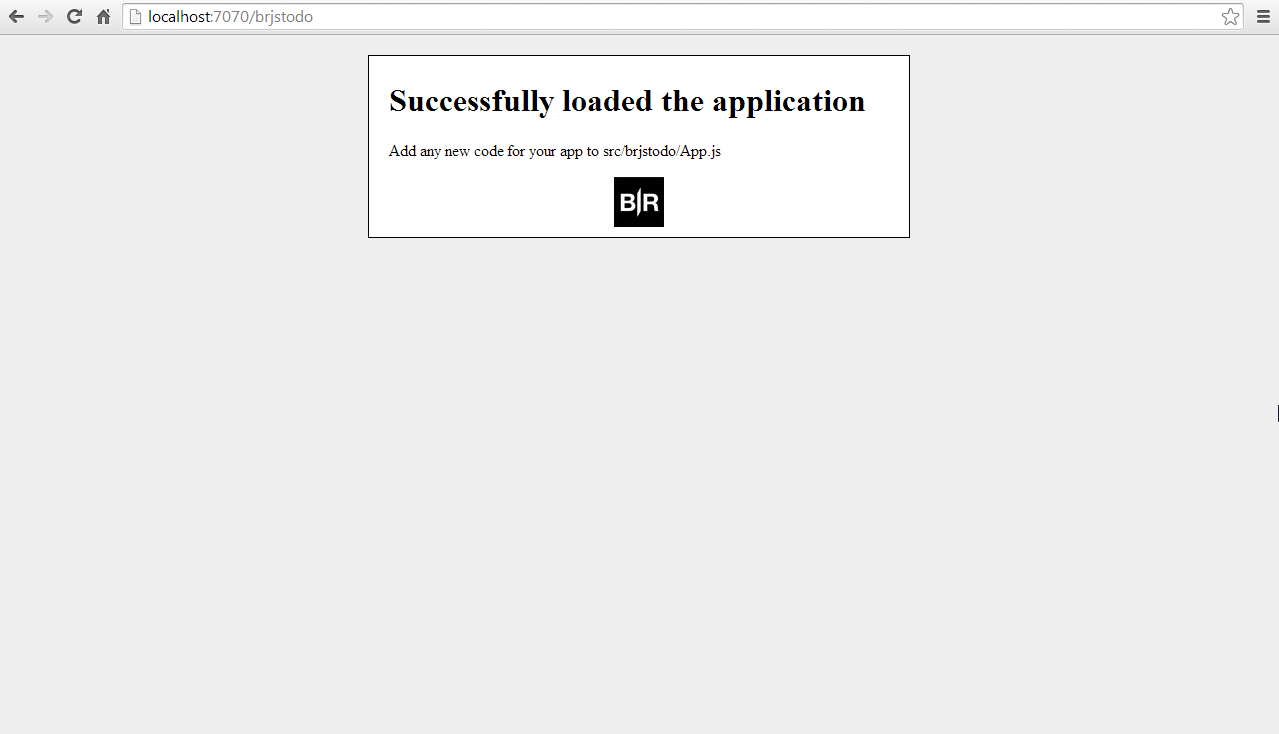
This will start the development web server running on localhost port 7070. You can view the aspect by navigating to http://localhost:7070/brjstodo.
You can now either open a new CLI window to enter future commands in the getting started guide, or press Ctrl + C to kill the server and start it again next time you need the server.
The Todo Input Blade
Blades are a core concept within BRJS. Blades are modules that encapsulate all the required functionality and resources – JavaScript, HTML, CSS, XML, images, etc – to implement a particular high level feature. So, let's create a Blade for capturing the todo Input items. By default blades reside within the blades directory in your app.
Scaffold the Blade
To create a blade we use the create-blade command. This has the following format:
$ BRJS_HOME/sdk/brjs create-blade <app-name> <bladeset-name> <blade-name>
Let's create a new blade called input within our brjstodo application:
$ ./brjs create-blade brjstodo default input
This creates a input directory within BRJS_HOME/apps/brjstodo/blades/ containing the following sub-directories:
src- for the JavaScript for the Bladetest-unit- blade unit teststest-acceptance- blade acceptance teststhemes- for CSS and imagesworkbench- for the Workbench for the Blade we're developingresources- for everything else
The default parameter ensures that the blade is created within the blades directory. The format of this command will change when we add support for context aware commands.
View the Code
Within brjs-apps/brjstodo/blades/input/src/ you'll find an InputViewModel.js file. Open this file to see the following:
'use strict';

var ko = require( 'ko' );
var i18n = require( 'br/I18n' );

function InputViewModel() {
    this.eventHub = require 'service!br.event-hub' );
    this.welcomeMessage = ko.observable( 'Welcome to your new Blade.' );
    this.buttonClickMessage = ko.observable( i18n( 'brjstodo.input.button.click.message' ) );
    this.logWelcome();
}

InputViewModel.prototype.buttonClicked = function() {
    console.log( 'button clicked' );
    var channel = this.eventHub.channel('input-channel');
    channel.trigger( 'hello-event', { some: 'Hello World!' } );
};

InputViewModel.prototype.logWelcome = function() {
    console.log(  this.welcomeMessage() );
}

module.exports = InputViewModel;
InputViewModel is a View Model which is bound to a view. You'll also see that we require something called ko. This is a reference to Knockout and we use this by default for building View Models.
- We plan to add better template support which will allow for more flexible file naming and also support for other front-end frameworks to be used by default e.g. Angular, Ember, Polymer (Web Components), React
The view definition can be found in an HTML template in input/resources/html/view.html:
<div id="brjstodo.input.view-template">
    <div class="default-input-blade">
        <h1 class="hello-world-message">
        <!-- new code -->
             @{brjstodo.input.hello.world}
        <!-- end of new code -->
        </h1>
        <p class="welcome-message" data-bind="text:welcomeMessage"></p>
        <p>Try using alternative stylesheets to switch the theme.</p>
        <!-- new code -->
        <p data-bind="text:buttonClickMessage"></p>
        <button class="button" data-bind="click:buttonClicked">Say Hello!</button>
        <!-- end of new code -->
    </div>
</div>
You will see that the text <p data-bind="text:buttonClickMessage"></p> will get the value of the View Model's buttonClickMessage property (data-bind="text:buttonClickMessage") and that the buttonClick View Model function will be called when the button is clicked (data-bind="click:buttonClicked"). The @{brjstodo.todo.input.hello.world} causes the text to be loaded from internationalization files. We'll ignore internationalization (i18n) for the purposes of this guide but you can read more here.
Run the Blade in a Workbench
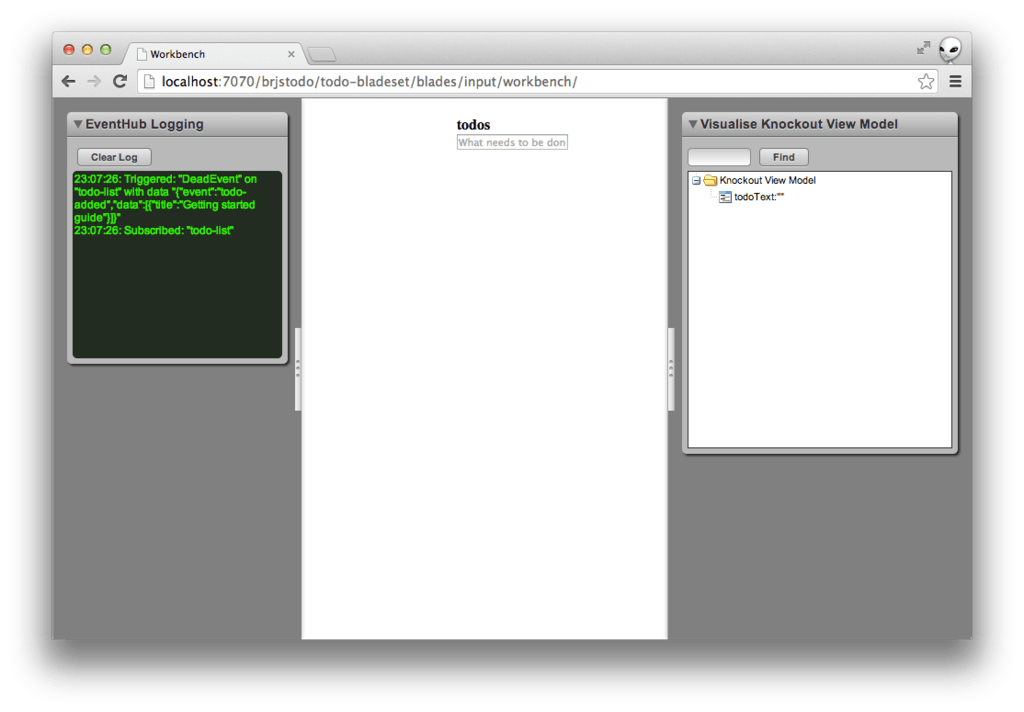
Now that you've seen the View Model class and the view template, let's launch a Workbench and see the Blade running in isolation. Ensure the development web server is running (BRJS_HOME/sdk/brjs serve) and navigate to the workbench via http://localhost:7070/brjstodo/default/input/workbench/.
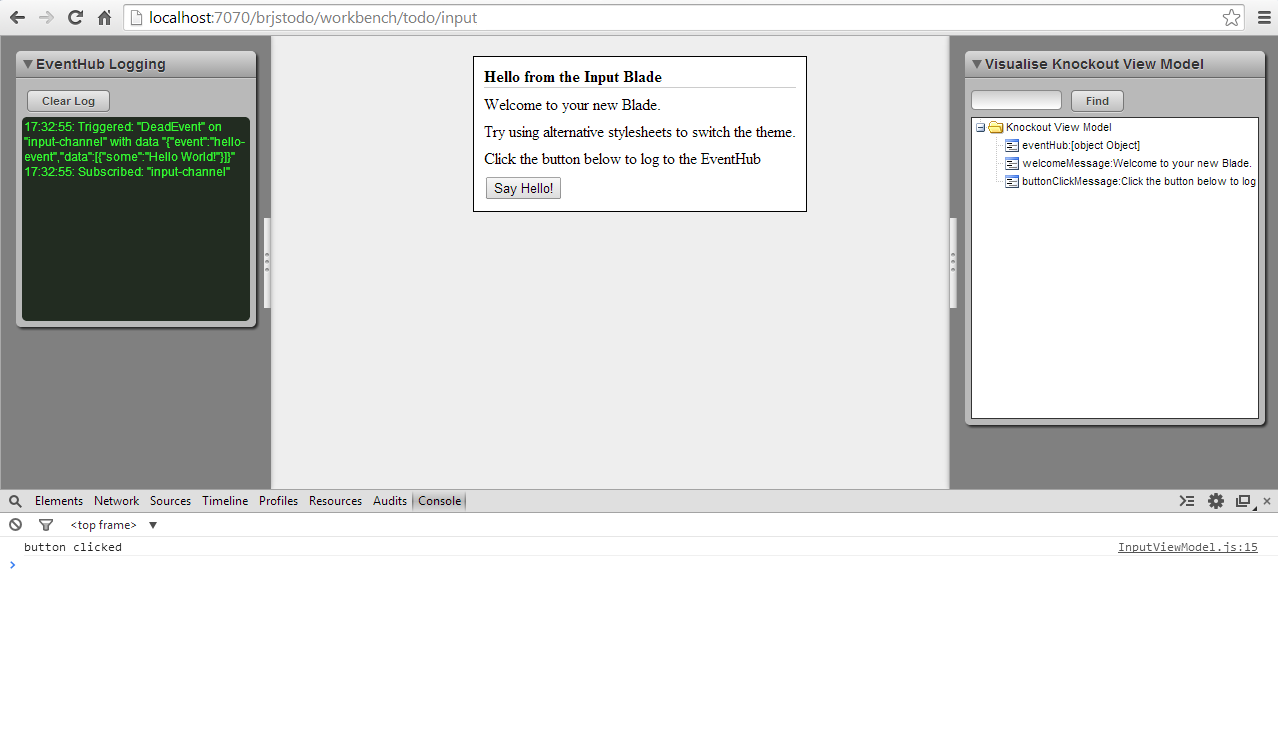
You'll notice that there's a Visualise Knockout View Model Workbench Tool that shows a tree visualisation of the View Model. In there you'll see a simple message:Hello World! name and value.
If you click the Log me button the buttonClicked function is called and button clicked will be logged to the JavaScript console.
Add Two-Way Data Binding
For now we do not need the i18n library or the EventHub service, we can remove these two requires and clear the InputViewModel constructor.
Next, let's edit the Blade to display an <input> element with a two-way binding between the View and View Model.
To do this update the message instance variable to be called something more relevant to better reflect it will contain todo text: todoText. Additionally, the default value should be blank.
Finally, instead of having to click a button we should handle the Enter/Return key being pressed as an indication of a new todo item being finalized. Let's rename buttonClicked to keyPressed and only handle the key press if it was the correct key by checking event.keyCode to ensure its value equals ENTER_KEY_CODE:
'use strict';

var ko = require( 'ko' );

/*** New code ***/
var ENTER_KEY_CODE = 13;
/*** End of new code ***/

function InputViewModel() {
    /*** New code ***/
    this.todoText = ko.observable( '' );
    /*** End of new code ***/
}

/*** New code ***/
InputViewModel.prototype.keyPressed = function( item, event ) {
    if( event.keyCode === ENTER_KEY_CODE ) {
        var todoTextValue = this.todoText();
        console.log( todoTextValue );
    }

    return true;
};
/*** End of new code ***/

module.exports = InputViewModel;
We also update view.html to remove the default content. It should now contain an input element where the element's value property is bound to the newly named todoText value. We want instant two-way binding so we also need to add valueUpdate:'afterkeydown' to the data-bind attribute. And we also want to call the newly named keyPressed function when a key is pressed in the input to check to see if it was the Enter/Return key. We do this by adding event: { keypress: keyPressed } to the data-bind attribute.
Finally, update the class attribute to indicate the input is a todo-input, add a placeholder attribute, remove the unused <button> element, wrap in a <header> element and add a <h1> to indicate this is where the todos are entered.
The content of input/resources/html/view.html should now look like this:
<div id="brjstodo.todo.input.view-template">
     <!-- New code -->
    <header id="header">
        <h1>todos</h1>
        <input id="new-todo" type="text" class="todo-input"
                     data-bind="value:todoText,
                                            valueUpdate:'afterkeydown',
                                            event: { keypress: keyPressed }"
                     placeholder="What needs to be done?" />
    </header>
    <!-- End of new code -->
</div>
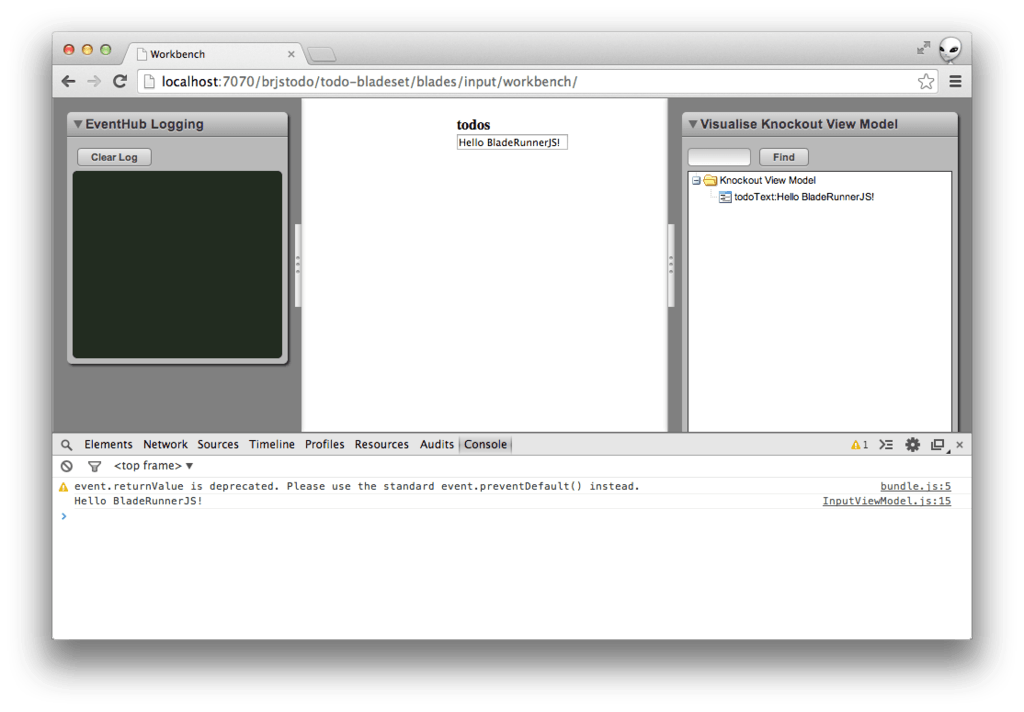
If you refresh your Workbench and change the value in the input element you'll instantly see the value updated in the Workbench Tool under Knockout View Model -> todoText -> value. Pressing Enter/Return will now log the message that's been entered into the input.
Testing a Blade
A core concept with BRJS is building a JavaScript application that scales. One of the best ways to ensure that an application scales is to ensure it is maintainable via thorough testing. So, let's write a test.
By default BRJS uses JSTestDriver.Part of our plugin architecture will eventually support additional unit test runners.
Write the Test
When you scaffold a new blade a test class is also created. The scaffolded test can be found in input/test-unit/tests/InputViewModelTest.js:
( function(){
    var InputViewModelTest = TestCase( 'InputViewModelTest' );

    var InputViewModel = require( 'brjstodo/input/InputViewModel' );

    InputViewModelTest.prototype.testSomething = function() {
        var model = new InputViewModel();
        assertEquals( 'Welcome to your new Blade.', model.welcomeMessage() );
    };
}() );
The simplest test we can write at the moment is to check that the todoText field is initialized with an empty string value.
( function(){
    var InputViewModelTest = TestCase( 'InputViewModelTest' );

    var InputViewModel = require( 'brjstodo/input/InputViewModel' );

    InputViewModelTest.prototype.testSomething = function() {
        var model = new InputViewModel();
        /*** new code ***/
        assertEquals( '', model.todoText() );
        /*** end of new code ***/
    };
}() );
Each blade comes with unit tests and acceptance tests and we'll cover acceptance tests later.
Run the Test
There are a few ways to run the tests using JSTestDriver, but the simplest is probably to start the test server using the CLI:
$ BRJS_HOME/sdk/brjs test-server --no-browser
The test server will then start up on the default port (4224) and continue running in the terminal/console that you started it in.
Then in the web browser (or browsers) you wish to execute the tests in navigate to http://localhost:4224/capture?strict. This browser is now waiting for the test server to instruct it to run tests.
You can now run the tests by opening up another terminal/console tab/window and executing BRJS_HOME/sdk/brjs test path_to_directory_to_scan_for_tests [test-type] where test-type optional parameter identifies whether the unit tests or acceptance tests should be ran. In our case we just want to run the input unit tests tests by running:
$ BRJS_HOME/sdk/brjs test ../brjs-apps/brjstodo/blades/input/ UTs
If all goes well you should see output similar to the following:
› ./brjs test ../brjs-apps/brjstodo/blades/input/ UTs
Server already running, not bothering to start a new instance...

Testing test-unit (UTs):
.
Total 1 tests (Passed: 1; Fails: 0; Errors: 0) (2.00 ms)
    Chrome 37.0.2062.124 Mac OS: Run 1 tests (Passed: 1; Fails: 0; Errors 0) (2.00 ms)
Tests Passed.

== Runner Report ==
- Tests Passed
If you wanted to run all tests of all types for the application you would execute:
$ BRJS_HOME/sdk/brjs test ../brjs-apps/brjstodo
We've now created our first blade, seen it running in a workbench, updated the blade and seen the change in the workbench, and written a simple test to check the View Model initialized state. It's time to create our second blade.
Create a Todo Items Blade
Create a second blade to show the Todo list Items. As with the first Blade, we do this using the CLI:
$ BRJS_HOME/sdk/brjs create-blade brjstodo default items
This will create all the same assets that were created for the first blade, but in a items directory.
Open up the newly generated blades/items/src/ItemsViewModel.js. As with the previous blade, we can remove the superfluous code and update the JavaScript so it looks like this:
'use strict';

var ko = require( 'ko' );

function ItemsViewModel() {
    /*** new code ***/
    this.todos = ko.observableArray( [
        { title: 'foo' },
        { title: 'bar' }
    ] );
    /*** end of new code ***/
}

module.exports = ItemsViewModel;
The class has a member variable called todos that is an `observableArray' because it will contain a number of todo items. For testing purposes we've added a couple of default items. The main thing to note about the items right now is that they have a title property.
Next we need to update the View HTML template to loop over the todos Array and display each one in an unordered list. First remove the default content, then we can use the foreach binding.
Update the items view, BRJS_HOME/brjs-apps/brjstodo/blades/items/resources/html/view.html, to have the following HTML:
<div id="brjstodo.items.view-template">
    <!-- new code -->
    <section id="main">
        <ul id="todo-list" data-bind="foreach:todos">
            <li>
                <div class="view">
                    <label data-bind="text:title"></label>
                </div>
            </li>
        </ul>
    </section>
    <!-- end of new code -->
</div>
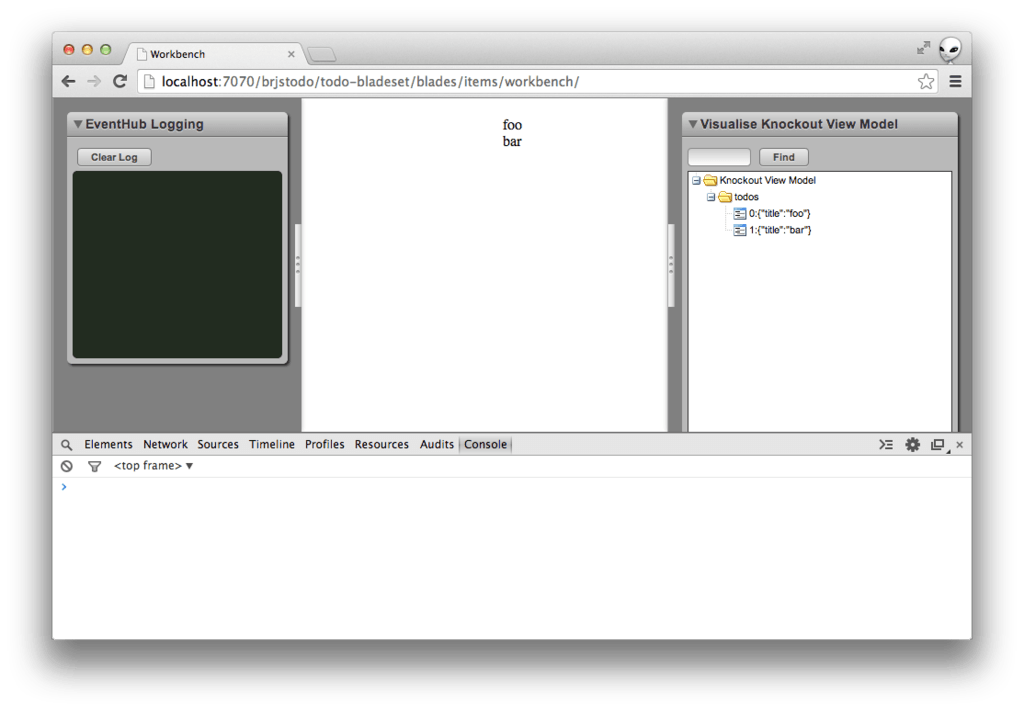
If you ensure the BRJS development server is running (BRJS_HOME/sdk/brjs serve) and launch the Workbench for this Blade via http://localhost:7070/brjstodo/default/items/workbench/ you'll see the two hard-coded list items.
Inter-Blade communication using an EventHub
We now have a way for a user to input a todo list item and a place to show the items. But, how do we get the Blades to communicate with each other, so that when an item is added in one blade it is shown on the other? One way of doing this is to use an EventHub. BRJS provides a default Event Hub service to help with this.
Update the Todo Input Blade
Back in our input blade we can access the EventHub service using the via ServiceRegistry using the require( 'service!<service name>' ) syntax, as shown in the InputViewModel constructor below:
'use strict';

var ko = require( 'ko' );

var ENTER_KEY_CODE = 13;

function InputViewModel() {
    this.todoText = ko.observable( '' );

    /*** new code ***/
    this._eventHub = require( 'service!br.event-hub' );
    /*** end of new code ***/
}

InputViewModel.prototype.keyPressed = function( item, event ) {
    if( event.keyCode === ENTER_KEY_CODE ) {
        var todoTextValue = this.todoText();
        console.log( todoTextValue );
    }

    return true;
};

module.exports = InputViewModel;
Now, in the keyPressed function we can trigger an event called todo-added on a todo-list channel to tell any interested parties (the items Blade) that a new Todo list item has been input, and the user has indicated they want to add it. The eventData we send with the event will have a title property representing the todo item text. We can also clear down the todoText and it's associated element value.
'use strict';

var ko = require( 'ko' );

var ENTER_KEY_CODE = 13;

function InputViewModel() {
    this.todoText = ko.observable( '' );

    this._eventHub = require 'service!br.event-hub' );
}

InputViewModel.prototype.keyPressed = function( item, event ) {
    if( event.keyCode === ENTER_KEY_CODE ) {
        var todoTextValue = this.todoText();
        /*** new code ***/
        var eventData = { title: todoTextValue };
        this._eventHub.channel( 'todo-list' ).trigger( 'todo-added', eventData );

        this.todoText( '' );
        /*** end of new code ***/
    }

    return true;
};

module.exports = InputViewModel;
Before we update the items Blade to listen for this event, let's first see how services make it really easy to test our blades.
Testing in the Workbench
In a future version of this getting started guide we'll show how you can easily add test code to the Workbench, or Workbench Tools, to facilitate this testing. However, the auto-generated code for the Workbench would add unnecessary complexity to this guide. See: zero-conf workbenches.
Ensure the BRJS server is running (BRJS_HOME/sdk/brjs serve) and open up the input Workbench via http://localhost:7070/brjstodo/default/input/workbench/. If you input some text and press Enter you'll see a message appear in the EventHub Logging Workbench Tool. It's logged as a DeadEvent because nobody is actually listening to this event. You can manually inspect this to ensure the information logged is as expected.
Testing the Input Features
In BRJS we recommend testing your blades at two different levels. The first is using unit tests which we've already covered. The second is by acceptance testing your blade. Due to the BRJS application archictecture this is effectively testing your whole feature in isolation.
It is achieved in two ways:
- Interacting with the View Model and making assertions against the service interactions
- Instructing a fake service to behave in a particular way and verifying the state of the View Model
Acceptance tests should be defined in the test-acceptance directory and our tests for this blade can be defined in input/test-acceptance/tests/InputViewModelTest.js. By default these tests will use version 1 of jasmine.
Since the Input blade does not receive data from a service we can only test interactions with a service. In this case it uses the EventHub the first thing we should do is add our own fakeEventHub definition to the ServiceRegistry so that we can track interactions and control behaviour. We can set this up in a beforeEach block. In this function we can create a fakeEventHub to capture any events that are triggered. We then deregister any existing services with the br.event-hub identifier and then register our fake event hub. The fakeEventHub variable has a scope so that it's accessible to the new test (the first test doesn't need to be updated):
'use strict';

require( 'jasmine' );

var InputViewModel = require( 'brjstodo/input/InputViewModel' );

/*** new code ***/
var ServiceRegistry = require( 'br/ServiceRegistry' );

var fakeEventHub;
var fakeChannel;
/*** end of new code ***/

describe( 'Input Tests', function() {

    /*** new code ***/
    beforeEach(function() {

        fakeChannel = {
            trigger: function( eventName, data ) {
                // store event name and data
                this.eventName = eventName;
                this.data = data;
            }
        };

        fakeEventHub = {
            channel: function( channelName ) {
                // store the name of the channel
                this.channelName = channelName;
                return fakeChannel;
            }
        };

        // ensure there isn't already an event-hub registered
        ServiceRegistry.deregisterService( 'br.event-hub' );

        // Register the fake event hub
        ServiceRegistry.registerService( 'br.event-hub', fakeEventHub );
    } );
    /*** end of new code ***/

} );
Now add the new test to ensure that when the Enter key is pressed (the keyPressed function is executed) that an event is triggered on the Event Hub.
        // Register the fake event hub
        ServiceRegistry.registerService( 'br.event-hub', fakeEventHub );
    } );

    /*** new code ***/
    it( 'should trigger an event on EventHub when Enter is pressed', function() {
        // Initialize
        var testTodoTextValue = 'write some code and test it';
        var inputViewModel = new InputViewModel();
        inputViewModel.todoText( testTodoTextValue );

        // Execute test
        inputViewModel.keyPressed( null, { keyCode: 13 } );

        // Verify
        expect( fakeEventHub.channelName ).toEqual( 'todo-list' );
        expect( fakeChannel.eventName ).toEqual( 'todo-added' );
        expect( fakeChannel.data.title ).toEqual( testTodoTextValue );
    } );
    /*** end of new code ***/

} );
The test initializes the input View Model, sets a Todo text value we expect to be present within the event data, calls the keyPressed function with a fake event object and verifies that the event is triggered on the expected channel, with the expected event name and data values.
Now that the test is written ensure the test server is running (BRJS_HOME/sdk/brjs test-server --no-browser), that you have a browser connected to the test server (http://localhost:4224/capture?strict) and execute the input acceptance tests:
$ BRJS_HOME/sdk/brjs test ../brjs-apps/brjstodo/blades/input/ ATs
You should see confirmation that the tests pass:
› ./brjs test ../brjs-apps/brjstodo/blades/input/ ATs
Server already running, not bothering to start a new instance...

Testing test-acceptance (ATs):
.
Total 1 tests (Passed: 1; Fails: 0; Errors: 0) (16.00 ms)
    Chrome 37.0.2062.124 Mac OS: Run 1 tests (Passed: 1; Fails: 0; Errors 0) (16.00 ms)
Tests Passed.
Update the Todo Items Blade
Now the input blade is triggering an event on the EventHub, the items Blade should be updated to listen for that event and update the UI accordingly.
First, get the EventHub using require( 'service!br-event-hub' ) and then register for the event on the channel:
'use strict';

var ko = require( 'ko' );

function ItemsViewModel() {
    this.todos = ko.observableArray( [
        { title: 'foo' },
        { title: 'bar' }
    ] );

    /*** new code ***/
    this._eventHub = require( 'service!br.event-hub' );

    // register to recieve events
    this._eventHub.channel( 'todo-list' ).on( 'todo-added', this._todoAdded, this );
    /*** end of new code ***/
}

/*** new code ***/
ItemsViewModel.prototype._todoAdded = function( added ) {
    this.todos.push( added );
};
/*** end of new code ***/

module.exports = ItemsViewModel;
In the code above we listen for todo-added events that are triggered on the todo-list channel. Whenever those events are triggered the _todoAdded instance function is called passing in the newly added item. We ensure the this context is maintained by passing in this as the third parameter to the eventHub.on function.
In _todoAdded we just need to add the item to the todos Knockout observableArray.
Testing in the Workbench
Open up the items Workbench via http://localhost:7070/brjstodo/default/items/workbench/en/ ensuring the BRJS development web server is running (BRJS_HOME/sdk/brjs serve). Open up the JavaScript console and enter the following code:
var hub = require( 'service!br.event-hub' );
hub.channel( 'todo-list' ).trigger( 'todo-added', { title: 'console todo item' } );
This gets the event-hub from the ServiceRegistry using require( 'service!br.event-hub' ) and then triggers a todo-added event on the todo-list channel. When you do this you'll see a new console todo item added to the list in the UI.
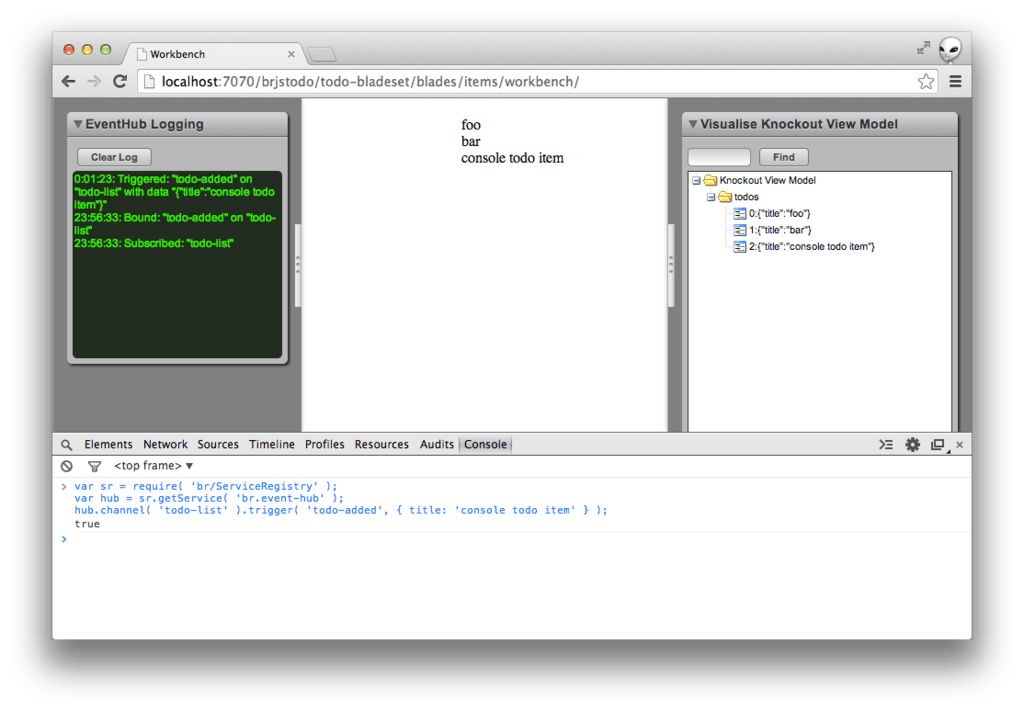
The EventHub presently logs channels being subscribed to, events being bound to and events being triggered. We also need a Workbench Tool for triggering events on channel.
Testing the Items Feature
As with the input Blade we can also test the items blade with the help of services. In this case we want to assert the state of the View Model following defined service behaviour. Specifically, we want to ensure that the blade registers for the appropriate event with the EventHub and that when that event occurs the View Model data is updated.
First we want to set up a fake service that helps us interact with our blade. Replace the contents of items/test-acceptance/tests/ItemsViewModelTest.js with the following:
'use strict';

require( 'jasmine' );

var ItemsViewModel = require( 'brjstodo/items/ItemsViewModel' );

var ServiceRegistry = require( 'br/ServiceRegistry' );

var fakeEventHub;
var fakeChannel;

describe('Items Tests', function() {

    beforeEach( function() {
        fakeChannel = {
            on: function(eventName, callback, context) {
                // store event name and data
                this.eventName = eventName;
                this.callback = callback;
                this.context = context;
            }
        };

        fakeEventHub = {
            channel: function( channelName ) {
                // store the name of the channel
                this.channelName = channelName;
                return fakeChannel;
            }
        };

        // ensure there isn't already an event-hub registered
        ServiceRegistry.deregisterService( 'br.event-hub' );

        // Register the fake event hub
        ServiceRegistry.registerService( 'br.event-hub', fakeEventHub );
    } );

} );
If this weren't a getting started guide we'd probably create a class that can be shared between the two Blades that implements the same interface as the br.event-hub service, and use it for testing.
This code ensures that any interaction with the br.event-hub service is captured so that we can test it. Our test will then simply check that the correct channel name is being subscribed to, the appropriate event is being bound to and that it is the itemsViewModel that is doing the binding:
        // Register the fake event hub
        ServiceRegistry.registerService( 'br.event-hub', fakeEventHub );
    } );

    it( 'should register for todo events on the EventHub', function() {
        var itemsViewModel = new ItemsViewModel();

        expect( fakeEventHub.channelName ).toEqual( 'todo-list' );
        expect( fakeChannel.eventName ).toEqual( 'todo-added' );
        expect( fakeChannel.context ).toEqual( itemsViewModel );
    } );

} );
Now you can execute the acceptance tests, using BRJS_HOME/sdk/brjs test ../brjs-apps/brjstodo/blades/items/ ATs, ensuring that the test server is running (BRJS_HOME/sdk/brjs test-server) and at least one browser is connected (http://localhost:4224/capture?strict):
› ./brjs test ../brjs-apps/brjstodo/blades/items/ ATs
Server already running, not bothering to start a new instance...

Testing test-acceptance (ATs):
.
Total 1 tests (Passed: 1; Fails: 0; Errors: 0) (13.00 ms)
    Chrome 37.0.2062.124 Mac OS: Run 1 tests (Passed: 1; Fails: 0; Errors 0) (13.00 ms)
Tests Passed.
As explained above, we also want to make sure the View Model is updated with a new item when the todo-added event is received. So, also add the following test:
it( 'should add a new item when todo-added is triggered', function() {
    var itemsViewModel = new ItemsViewModel();
    var itemText = 'hello';

    // trigger the callback
    fakeChannel.callback.call( fakeChannel.context, { title: itemText } );

    // check the item has been added to the end of the list
    var items = itemsViewModel.todos();
    expect( items[ items.length - 1 ].title ).toEqual( itemText );
} );
Re-running the test command will now show two tests successfully passing.
Since we know that the blade uses the EventHub to receive new items, and we have a fake hub in place, we can execute the callback that the blade is waiting for, passing Todo item data, and then check that the item has been added to the end of the list.
Both the input and items blades have the functionality that we're looking for, and they are set up to communicate using the br.event-hub service. The next thing to do is to add them to the application entry point (we call these Aspect because you can have multiple entry points). We'll then have a fully functional Todo List app.
Adding the Blades to the App
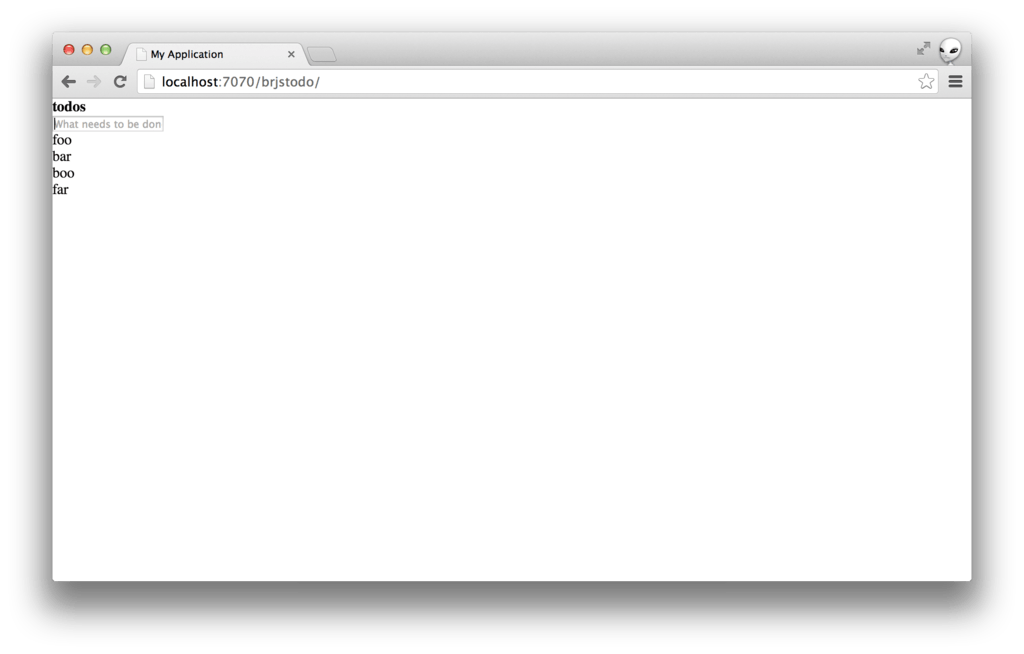
In order to add the blades to the app we need to first update the apps's default HTML entry point to provide some basic structure. You can see the current state of the app by ensuring the BRJS server is running (BRJS_HOME/sdk/brjs serve) and navigating to http://localhost:7070/brjstodo.
To add the blades to the app open up brjstodo/index.html remove the div element containing the app class and update it to look as follows:
<!DOCTYPE html>
<html>
    <head>
        <meta charset="UTF-8">

        <title>My Application</title>

        <!-- new code -->
        <@css.bundle theme="common"@/>
        <!-- end of new code -->

    </head>
    <body>
        <!-- new code -->
        <section id="todoapp"></section>
        <!-- end of new code -->

        <!-- dev-minifier can be set to "combined" for all JS content to be bundled with a single request -->
        <@js.bundle dev-minifier="none" prod-minifier="combined"@/>
        <script>
            ( function() {
                var App = require( 'brjstodo/App' );
                var app = new App();
            } )();
        </script>
    </body>
</html>
The <@css.bundle theme="common"@/> tag is replaced at build time with a reference to a CSS bundle and the <@js.bundle@/> with a reference to the generated JavaScript source. This will be either numerous script tags for each JavaScript file or a single bundle file.
The element with the ID of header will have the Todo Input element appended to it for users to enter their todo items. The <section> with the ID of todoapp will first have the todo input element appended to it followed by the Todo items element. You'll also see that we initialize our application App object here.
Open brjstodo/src/App.js and in the App class create two instances of the objects we've just defined and tested; an Input InputViewModel and an Items ItemsViewModel. In addition we're going to use a class called KnockoutComponent that helps us create a DOM element from our view template and deal with binding that element to the view model. To do this we create a new KnockoutComponent instance and pass in an identifier to our view template and the view model instance:
'use strict';

/*** new code ***/
var InputViewModel = require( 'brjstodo/input/InputViewModel' );
var ItemsViewModel = require( 'brjstodo/items/ItemsViewModel' );

var KnockoutComponent = require( 'br/knockout/KnockoutComponent' );
/*** end of new code ***/

var App = function() {
    /*** new code ***/
    var inputViewModel = new InputViewModel();
    var inputComponent =
        new KnockoutComponent( 'brjstodo.input.view-template', inputViewModel );

    var itemsViewModel = new ItemsViewModel();
    var itemsComponent =
        new KnockoutComponent( 'brjstodo.items.view-template', itemsViewModel );
    /*** end of new code ***/
};

module.exports = App;
At this point we haven't added any content to our page and it will just a blank page.
In order for the Blade components to appear in the aspect we have to append the DOM elements that the KnockoutComponent instances create, to the Aspect (the main view into the Todo List web app). We do this by calling component.getElement() and appending the returned element append it to the todoapp element in the DOM:
'use strict';

var InputViewModel = require( 'brjstodo/todo/input/InputViewModel' );
var ItemsViewModel = require( 'brjstodo/todo/items/ItemsViewModel' );

var KnockoutComponent = require( 'br/knockout/KnockoutComponent' );

var App = function() {
    var inputViewModel = new InputViewModel();
    var inputComponent =
        new KnockoutComponent( 'brjstodo.input.view-template', inputViewModel );

    var itemsViewModel = new ItemsViewModel();
    var itemsComponent =
        new KnockoutComponent( 'brjstodo.items.view-template', itemsViewModel );

    /*** new code ***/
    var todoAppEl = document.getElementById( 'todoapp' );
    todoAppEl.appendChild( inputComponent.getElement() );
    todoAppEl.appendChild( itemsComponent.getElement() );
    /*** end of new code ***/
};

module.exports = App;
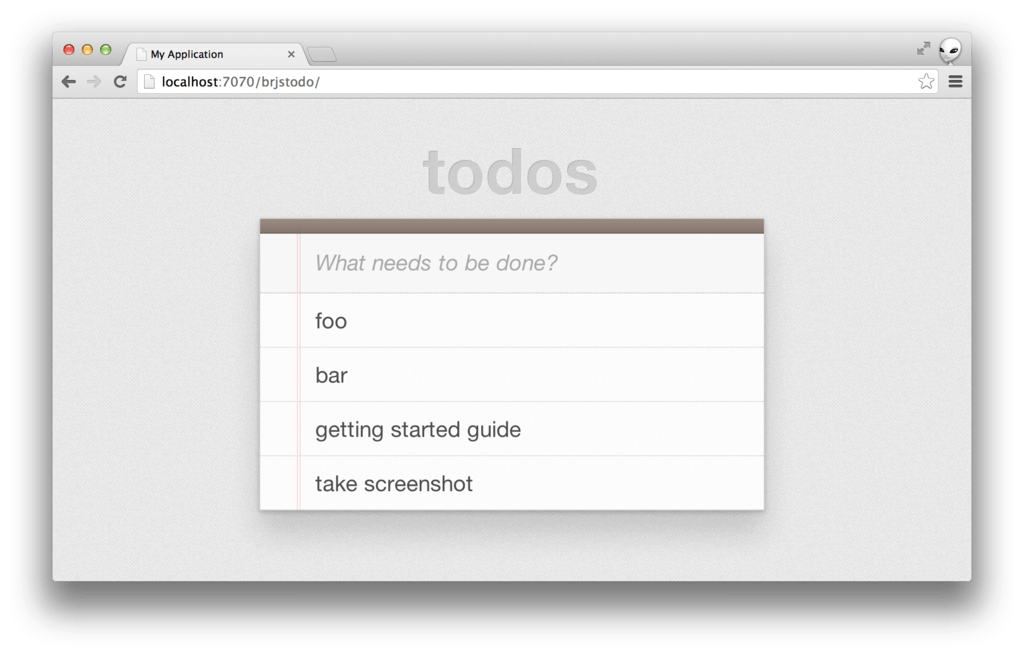
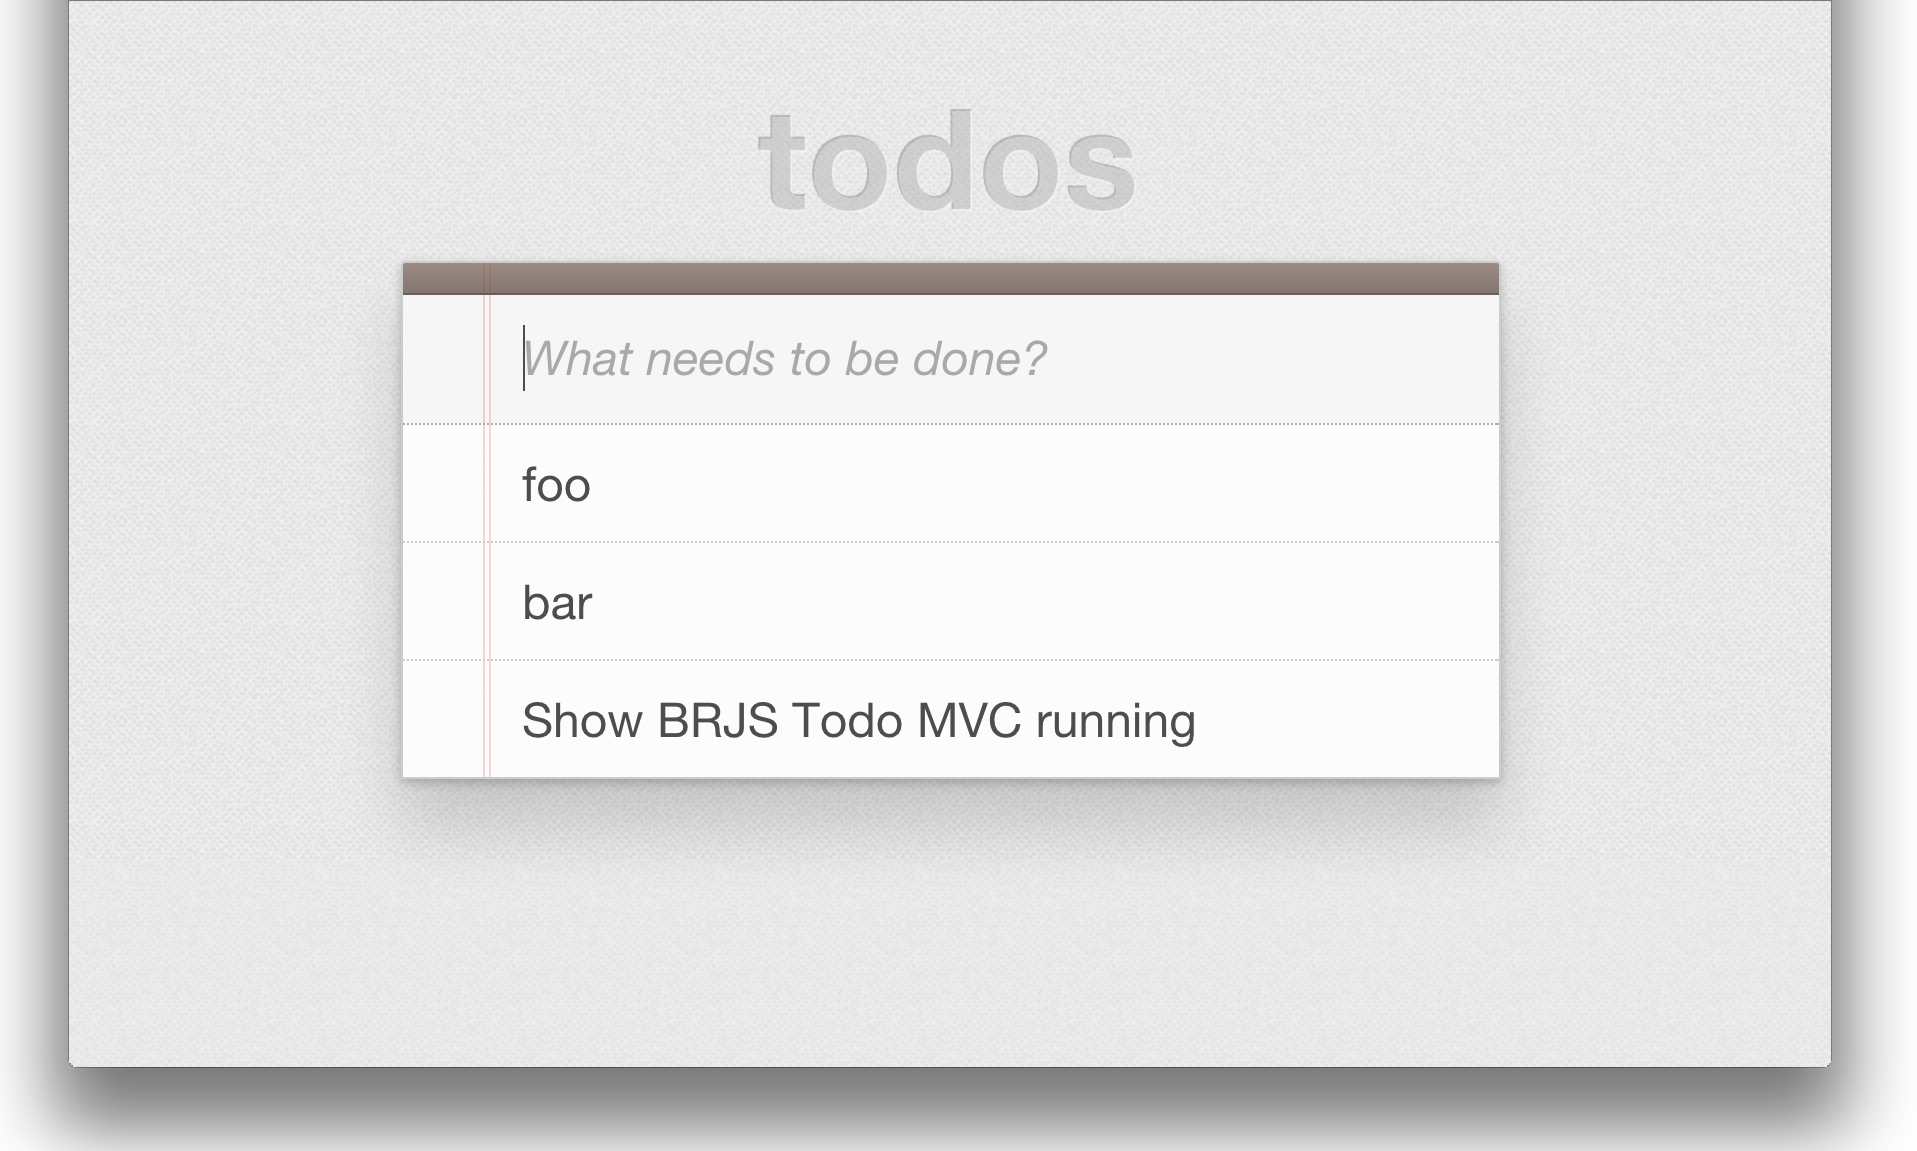
If we refresh the application we'll now see the Input and the Todo List appended to the view. The application now lets you enter todos into the input and when you press Enter/Return the todo is appended to the items list.
Finally, we really need to apply some styling to the application.
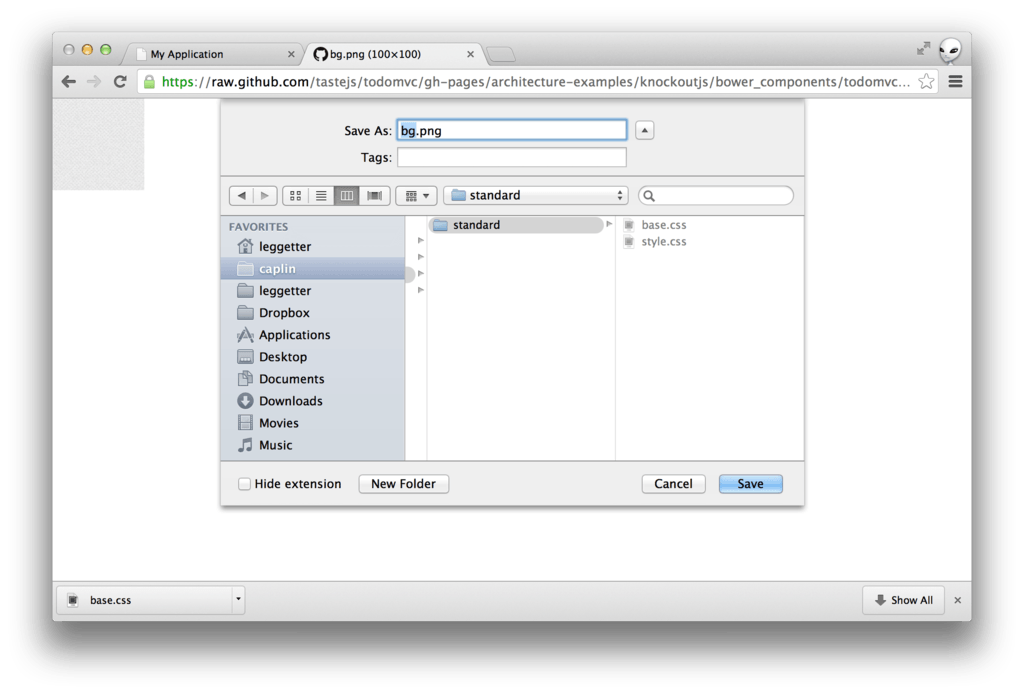
Styling can be applied at a number of levels; from Blade through to Aspect. In our case we'll apply the styling at the Aspect level. Since we've already covered the key points in developing a BRJS application we're going to miss out the styling part. Download the two following files from the Todo MVC Knockout example and place them in brjstodo/themes/common/:
Then refresh the app.
You now have a reasonable looking Todo List app based on the styling of Todo MVC that you can add items to. Now for deployment.
Build and Deploy
Here we'll cover building our app as static files that can be served from any web server or CDN (BRJS also supports WAR deployment.
Building an application as static files is achieved using a simple BRJS_HOME/sdk/brjs build-app <app-name> [path] command where app-name is the name of the app to build and where a path for the build is optional. You can therefore build the Todo app as follows:
› ./brjs build-app brjstodo
Built app 'brjstodo' available at 'BRJS_HOME/generated/built-apps/brjstodo'
The application then need to be served by a web server. The deployment guide gives a number of options to deploy your static app to public server. Here we'll use a one-line server python script, but any web server will easily serve the app.
cd /Users/leggetter/demos/v0.12/generated/built-apps/brjstodo
python -m SimpleHTTPServer 8000
Navigating to http://localhost:8000 will show you your built BRJS application running.
Summary
This comprehensive getting started guide has introduced you to blades, running Blades in isolation in workbenches, seeing how Workbenches help the development process, unit testing Blades, inter-Blade communication using an EventHub, how services facilitate testing, incorporating blades into an application entry point (aspects) and deploying your BRJS application.
You can find the code for this application in the brjstodo github repo.
Believe it or not, this just scrapes the surface of BladeRunnerJS. So...
Where Next?
Finish the Todo App
The getting started app doesn't offer 100% Todo App functionality. How about taking a look at the standard Todo MVC applications and adding some of that functionality using the brjstodo getting started code as a starting point. Functionality like:
- Marking a Todo Item as complete
- Deleting a Todo Item
- Edit a Todo Item
- Persisting data to a backend Service
- Making the Todo List collaborative by using a realtime service
Explore the Docs
Read up more about the concepts behind BRJS, discover additional ways to use BRJS or how you can extend BRJS to improve your developer workflow.
Get Involved
BRJS is an open source project that we really want others to get involved in through using, sharing and contribution. You can do this by watching BRJS on github and getting involved in the discussions. By building applications using BRJS and sharing your thoughts, findings and code. By extending BRJS through creating plugins that improve your developer workflow and sharing what you've done. Or by contributing to the core codebase.